Overkill MIC Live Lamp
We’re all used to seeing those Canford boxes, Sonifed LED bars or even an incandescent lightbulb painted red. Turns out you can get a lot more complicated than that.
It’s possible to combine a Raspberry Pi with a closing contact and television screen to get a half-decent looking “mic live” (or any other indicator) light. It’s not too complicated to achieve either.
Firstly, you’ll want to grab a Raspberry Pi and get a basic Raspbian install on it. We don’t need to overclock or do anything too clever with the configuraiton here. The default setting will be fine.
Once we’ve got a Pi booting into Raspbian, it’s time to load the files onto it. First step here is to download this file:
mic_live.zip
After you’ve downloaded it, extract the files into an empty folder.
To get the files onto the Pi, I’d recommend using SCP. On Windows, you’re best using WinSCP. On Mac, check out muCommander and Linux users should know what they’re doing. Either way, the server you want to connect to is the IP address of the Raspberry Pi (visible on boot or type in ifconfig), the username is pi and the password is raspberry.
Once you’re in, copy all the files into the /home/pi folder. This is enough to get the “lamp” working but we really want it to kick into life when we first boot the Pi. To do this, first log onto the terminal of the Pi using the pi/raspberry username and password combination. You then want to become root by typing in the sudo -s command.
We now want to create a new file using the nano /root/.xinitrc command. When nano loads, you want to put the following lines into the file:
xset s off
xset -dpms
xset s noblank
python /home/pi/mic_live.py
Now press CTRL+O to save and CTRL+X to exit. That will configure the “mic live” script to start when X does. However, we need to disable the screen blanking / power saving feature. To do this, enter the nano /etc/kbd/config and change the following lines:
BLANK_TIME=0
POWERDOWN_TIME=0
Again, press CTRL+O to save and CTRL+X to exit. We just need to install the xserver tools to support the screen blanking prevention we’ve put in place. To do this, simply run the apt-get install x11-xserver-utils command.
At this point, we’re almost there with just one more file to edit. You do this by typing in the crontab -e command and adding the following line to the end of the file:
@reboot startx
Again, it’s CTRL+O to save and CTRL+X to exit. All you need to do now is reboot the Pi. CTRL+ALT+DEL should do the trick and assuming everything’s configured correctly, you’ll boot into a “mic live” lamp.
It looks nice but doesn’t actually do anything at the moment. We now need to wire in our closing contact. You’re looking to make a connection between pin 1 (+3.3V) and pin 11 (GPIO) as shown in the image below.
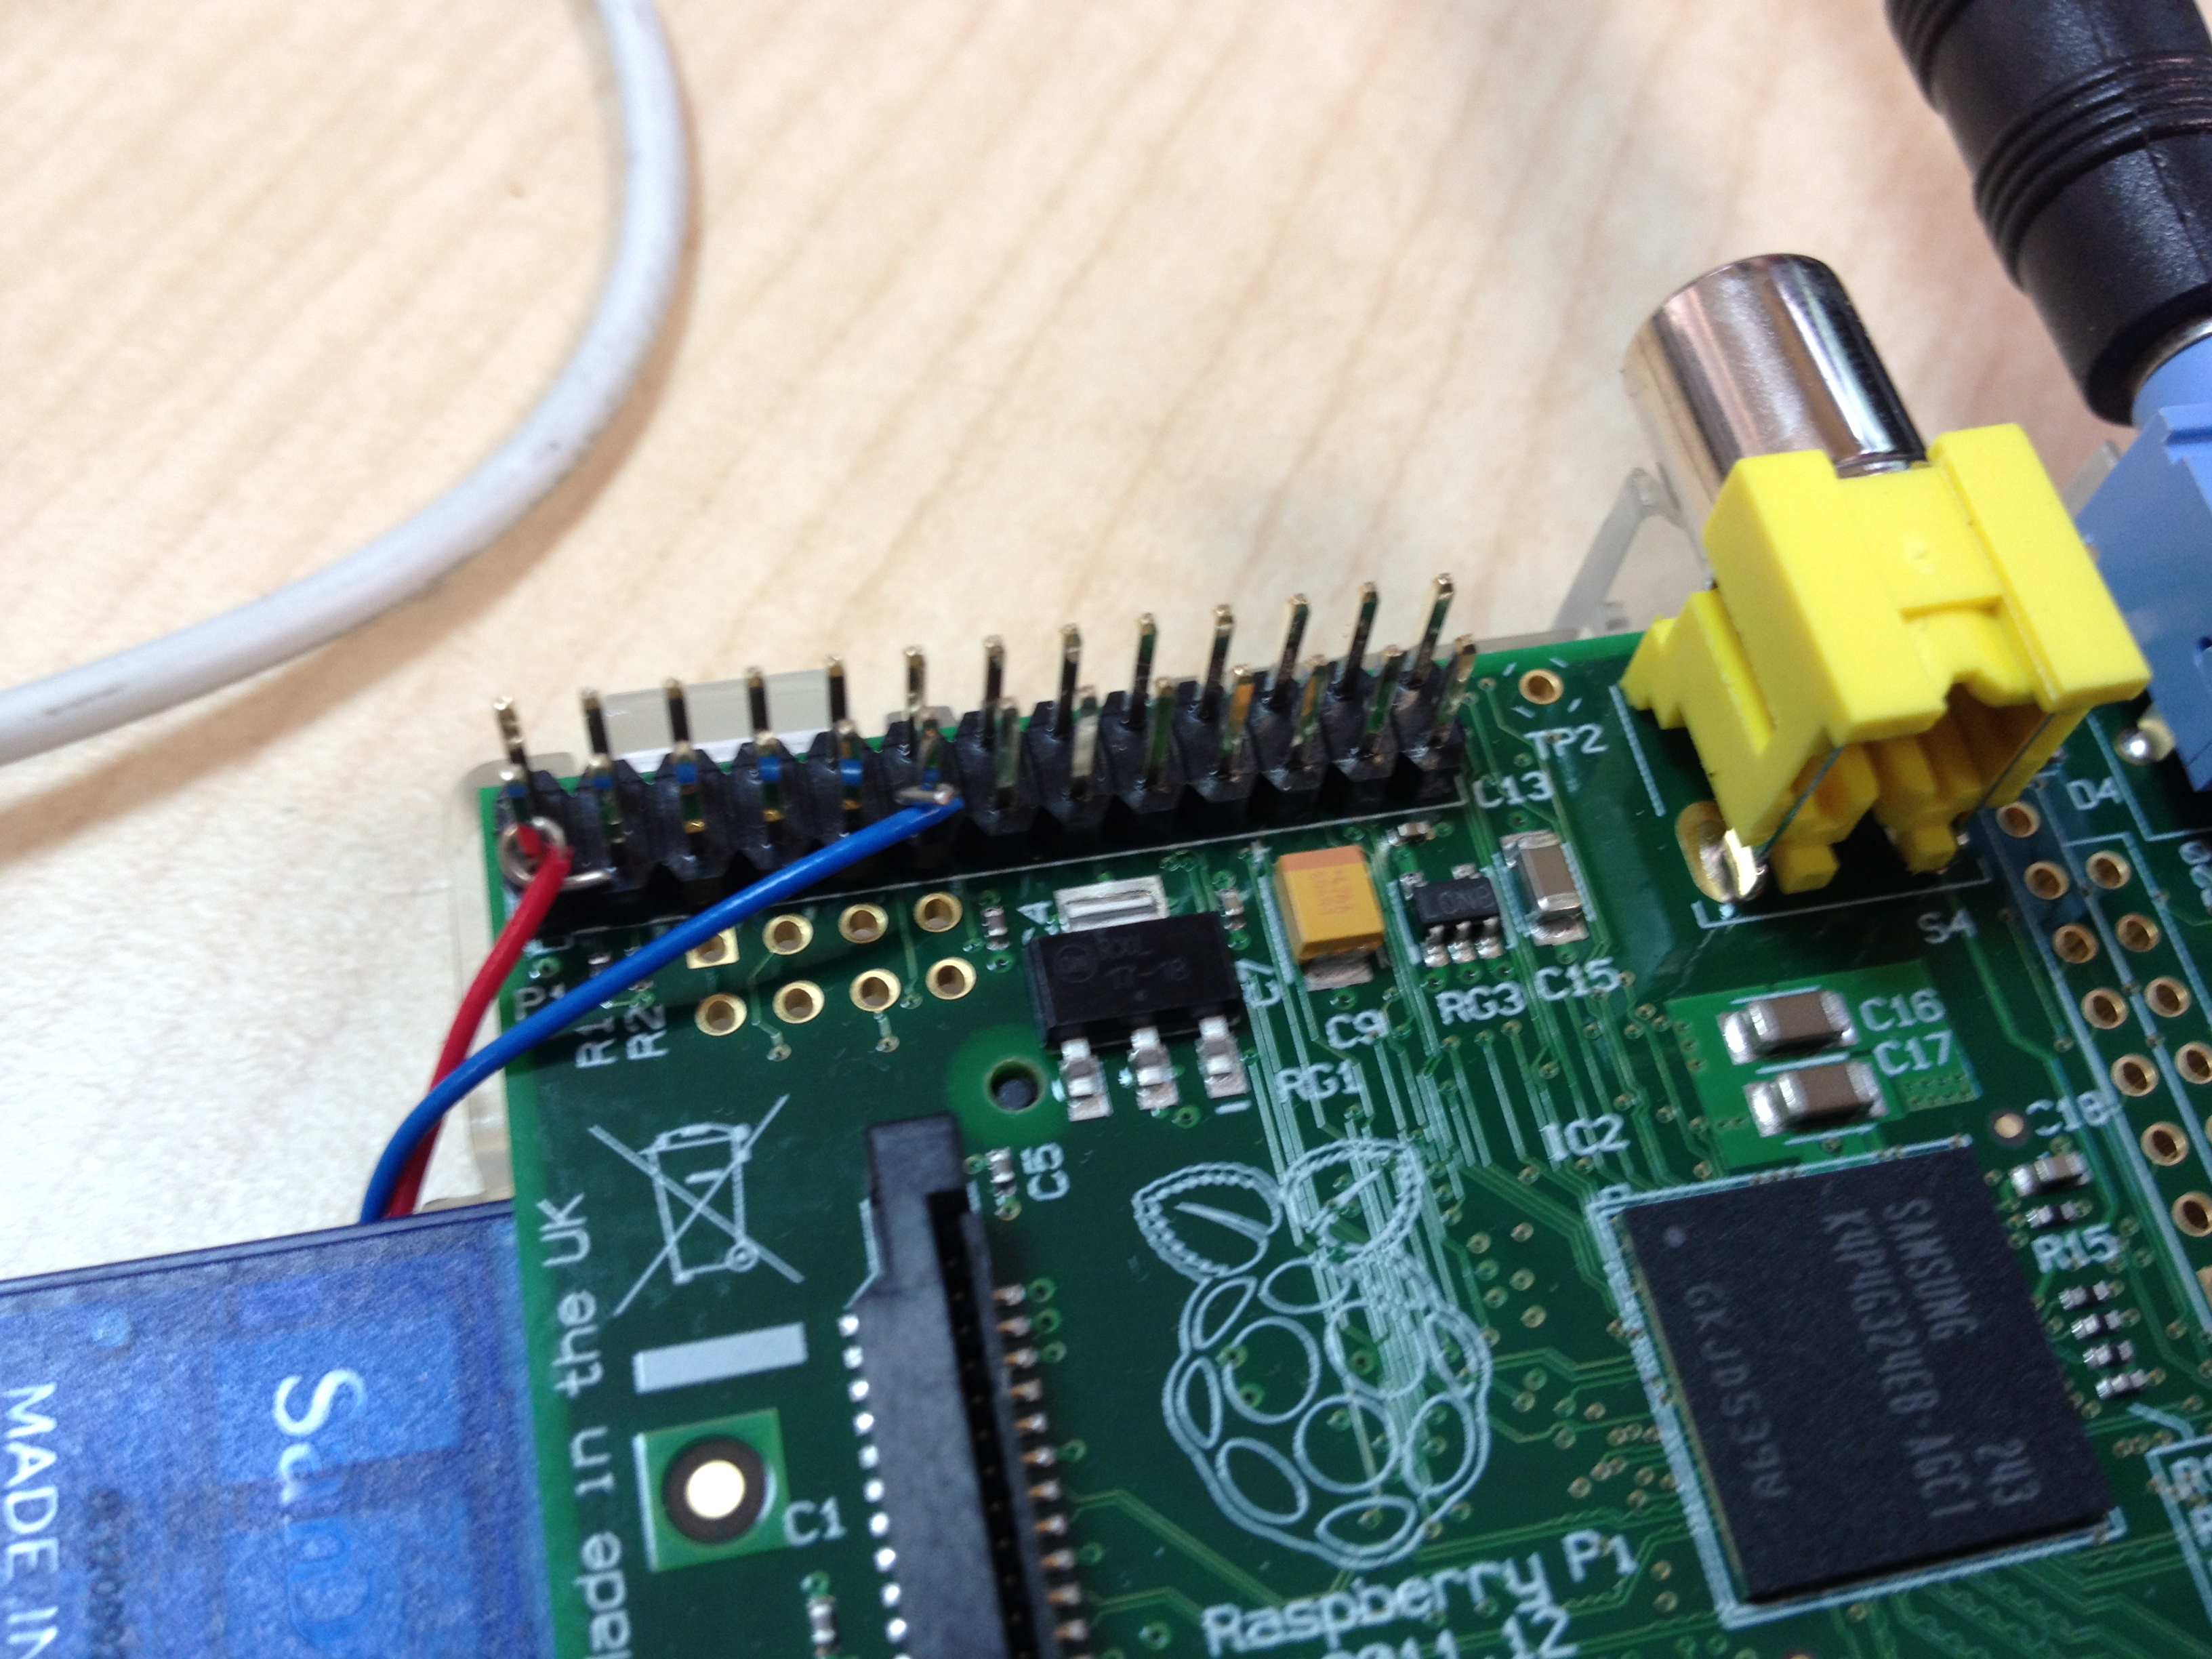
Be careful with this step. In fact, it’s probably best completed with the Pi off. You don’t want to connect a wire to the wrong pin and send 5V into the GPIO pin. It’s possible to fry the Pi doing this.
Assuming you’ve managed to wire in correctly, you should now get a lamp that lights up when the contact is closed (circuit completed) and goes off when the contact is opened (circuit open) as demonstrated in the video below.